FergWorld : Articles : Flying the Twin Comanche

By Ryan Ferguson
Many prospective buyers have contacted me asking about the Twin Comanche. My goal with this article is to share what I've learned over the last 1.5 years of ownership, as well as my admittedly biased opinion of this impressive light twin. It is my hope that I can refer airplane buyers to this document as a "catch-all" information destination.
For the purposes of specificity, I will focus on the model I own, a 1966 Twin Comanche PA-30B. 1964 and 1965 are just known as the 'PA-30,' and 1969 through 1972 are C models.
SECTIONS
GENERAL OVERVIEW OF THE NORMALLY ASPIRATED TWIN COMANCHE
So, you just want an owner to give you the inside scoop on the aircraft you're considering for purchase? Here's the 'short' version – as short as I can make it, anyway.
 |
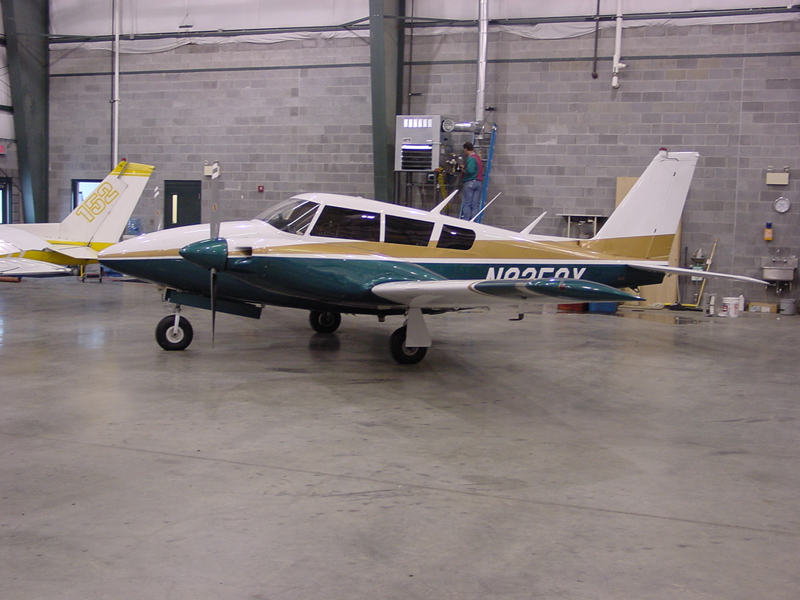
 From this picture you can see that the Twin Comanche has a naturally high AOA sitting on its landing gear.
 |
My 1966 Twin Comanche PA-30B has two Lycoming IO-320-B1A engines, normally aspirated, producing 160 horsepower per side. Maximum gross weight is 3600 lbs (3725 lbs. with tip tanks.) 84 gallons of useable fuel are available between the main (60 gallons total) and auxiliary (30 gallons total) tanks. The aircraft will seat four 'normal' sized people and their baggage, along with full fuel, with little difficulty. My aircraft is equipped with two extra jump seats which can be installed in the baggage area; perhaps children or very small adults could use them. Mine are unused as the aircraft is insured as a four-seater. Useful load is 1,200 lbs. Average payload with full fuel is around 650 lbs. in most Twin Comanches. The more gadgets, and the nicer/plusher interior you have, the lower that number will go. A typical 75% cruising speed is 165 knots true airspeed at approximately 8,000 feet density altitude. I've been told that the '64 and '65 models fly more slowly due to a dual-fork main gear design which hangs out further into the slipstream, creating more drag. Burning an average of 18 gallons per hour gives you just over 4 hours, 30 minutes endurance, or a range of 730nm without reserves. Slow it down to 65% and you will enjoy even better endurance and range.
The TwinCo's single engine performance is quite average for a light twin. At maximum gross weight, the aircraft's single engine service ceiling is just shy of 6,000 feet. One thing to consider with these numbers is that all light twins will uniformly have sluggish performance capabilities with one engine out at maximum gross weight. If the aircraft is light, you'll do significantly better. A good rule of thumb is to add 1,500 feet to the single engine service ceiling for every 10% under max gross weight. You'll never avoid a 'driftdown' if you lose one over the Rockies, however. Immunity is, unfortunately, not granted to light twins, and the Twin Comanche is no exception.
"If owning a twin is a step up and the price is a real issue, you're wise to look carefully into the possibility of a Twin Comanche. In my opinion, it compares very favorably to every light twin on the market in terms of bang for the buck."
Average accelerate-stop distance at sea level, in my ship, is about 2600 feet. Below that you'll usually sacrifice a bit of your twin engine safety. I don't operate from many short strips, so for me it is not an issue. Again, if you're light, the required balanced field length decreases.
THE RIGHT AIRPLANE FOR THE MISSION?
Most prospective buyers arrive at the Twin Comanche as an airplane of special consideration due to a combination of the following key advantages:
- The aircraft is very economical to operate.
- It's a twin; two generators, two vacuum pumps, two engines.
- It offers 160 knots or greater cruise speed.
- It's an excellent long or short trip airplane.
- It has a good balance between fuel and useful load. Leave the auxiliary tanks empty and you can even bring your baker and his wife.
- Maintenance is straight-forward and relatively inexpensive as twins go.
- The aircraft is still well supported, despite being out of production for thirty years.
Compare it to a Baron – which will give you a slightly higher cruise speed at twice the fuel burn and probably twice the maintenance cost – and the Twin Comanche wins the value contest hands-down. Compare it to a Seneca I, which is fraught with CG problems, and the Twin Comanche wins in both the price and application department. If owning a twin is a step up and the price is a real issue, you're wise to look carefully into the possibility of a Twin Comanche. In my opinion, it compares very favorably to every light twin on the market in terms of bang for the buck.
What's the right mission application? A family of four could make excellent use of the airplane. A businessman wanting high dispatch reliability and reasonable speed would be a good candidate. There aren't too many missions that the Twin Comanche won't excel at, unless:
1) You need to carry more than four people.
2) You need to carry a big, heavy load.
3) You really need more than 165 knots in cruise.
|
|
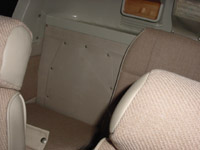 The baggage compartment doubles as the location for the jumpseats in the B and C models. Here, the left seat has been unsnapped. It's a tiny area; most owners remove these seats. Installing and removing the seats is a simple affair requiring no tools or paperwork.
 |
For missions of that nature, you'll simply need a bigger twin. The Twin Comanche is not geared to carry six; if you use the jump seats in the baggage compartment, you have no room for baggage. There is no nose locker in the standard Twin Comanche, so short of pleasure flights with partial fuel, no baggage, and six smallish people aboard, it's a four-seat airplane.
And as for going faster – well, who doesn't want to go faster? I'd love to get 180 or 200 knots out of my Twin Comanche, but without turbos and oxygen, it's not going to happen. I'm satisfied with the lower speed, lower operating costs, and lower fuel bills. I've flown long distances in the airplane and it's a very comfortable ride. Getting there an hour sooner wouldn't make a significant impact anyway. If you really want long trips to be 'shorter,' and your bladder can handle it, get the tip tanks. Skipping a fuel stop will save close to an hour.
IFR? Yes, that's the mission this plane is built for. If you fly IFR and you fly weather, this is a great ship, especially if you're considering it alongside some of the higher performance singles (which may actually be faster or offer a higher useful load.) Having two of everything signficantly reduces stress when you're pushing through weather. To date I've had two engine failures and a vacuum pump failure; the latter in the twin. The shafts on the dry pumps are prone to simply shear; that's how they're designed. If that's what I have to work with I'd much rather have two.
HOW SHE FLIES
So how is she to fly? In a word, delightful. The Twin Comanche is an agile, sleek sports car by comparison to its younger brother, the lumbering early model Senecas. Control forces are light, roll rates are reasonably fast, and the aircraft turns like it's on rails. However, the high wing-loading provides a much smoother ride through moderate turbulence than you would get from a Skylane, for example. In short, it's a great platform, a real pilot's airplane.
I've found that the ship is more sensitive in pitch than roll, and other owners have observed the same. You'll trim the plane with a hand-crank located on the ceiling. It takes a little getting used to, but you'll get the hang of it in no time. You'll find that tiny little nudges on the crank when the plane wants to slowly climb or descend will get you trimmed out more quickly.
Let's take the Twin Comanche for a flight and see what we find, shall we?
Stepping up onto the wing-walk and hopping aboard, you might note that the interior dimensions are somewhat Piper Arrow-like. The single door permits relatively easy ingress and egress. Once inside and in the pilot's seat, you'll find all of your switches in a row just above your knees; master, mags, starter, fuel pumps, lights, and pitot heat are all controlled here. If you're lucky, a previous owner will have rearranged the panel for you so that the 'standard T' cluster of instruments greets you. If you own a PA-30 or PA-30B model which has not been updated, the instruments are scattered around haphazardly. Sorry about that. Manufacturers just thought differently about panel design back then.
On the copilot side you'll find RPM, manifold pressure, fuel flow, and the gauge cluster which includes fuel, oil pressures and temperatures, and cylinder head temperatures.
Taxiing the plane is straightforward. The parking brake is quite weak and can't be relied upon to hold the plane in place during the runup, so we'll use the toe-brakes (located on the pilot's side only.)
We perform our pre-takeoff checklist, which includes double-checking the DG, activating the auxiliary fuel pumps, and verifying that both fuel selectors are set to the main tanks. As we taxi into position, it's time to review the engine failure procedure one more time, convince ourselves it's really going to happen on this departure, and be mentally ready to handle it. Okay, let's go!
We'll apply full power slowly, over the course of 4 or 5 seconds. After all, engines are expensive and we want to take good care of ours. Track the fuel flows, the engine gauges, and the airspeed. As we start rolling, here's where it gets interesting: although Vmc is placarded as 90mph, the plane's going to get light on the nose and start wanting bounce as you accelerate through 75mph. In reality, Vmc in this plane is 80mph – we'll get to that in a bit, but for now, don't try to hold it on the ground. Exert a very light back pressure on the yoke until the aircraft rotates. The Twin Comanche has a naturally high angle of attack just sitting on the ground and it won't take much help to get airborne.
As soon as the plane has broken ground, pitch forward gently to remain in ground effect. The goal here is to rapidly accelerate to blue-line (105mph) in ground effect, with the gear down. This only takes a couple of seconds; as you pass blue line, pitch for Vy (112mph), verify positive rate of climb, and retract the gear. Describing the procedure took a lot longer than actually doing it.
|
* Takeoffs are an often discussed/debated subject among Comanche pilots. The fact of the matter is, everyone has their own personal preference and there's more than one way to skin this cat. There are two other things to consider:
- You may wish to consider getting the small nosewheel mod. Essentially this gives you a slightly lower AOA when the plane is on its legs, at the price of 1" of your prop clearance. This modification should allow the plane to roll a little faster without bouncing. Personally, I don't think it's worth it.
- A method that I was introduced to by a very experienced Twin Comanche pilot is as follows: make every takeoff with half-flaps. Let the airplane rotate when it's ready - don't try to hold it down - and immediately pitch for Vy. The reasoning here is that the lowered flaps will a) reduce ground roll, b) increase your lift, c) reduce Vmc. In the event of an engine failure, you'll already have them deployed to land on the runway. I think there are some potential pitfalls here with high elevation operations, heavy operating weight, and various aircraft loading configurations, so I can't recommend it as the procedure of choice for every takeoff. However, one thing you certainly don't want to do under any cirumstances is hold the plane on the runway. When it wants to rotate, let it go.
|
At 500 feet AGL, you have the option of pulling the manifold pressure and props back to 25" and 2500RPM. This is a controversial topic, and I'll leave you to your own conclusions, but suffice it to say that the Twin Comanche has no problem climbing at full throttle. The only real advantage to a power reduction at 500 feet is noise reduction for the benefit of your airport neighbors. I also perform a '500 foot checklist' at this altitude, which includes verifying that the gear and flaps are both retracted.
At 1,000 feet AGL, turn off the auxiliary fuel pumps one by one while monitoring the fuel flow. Call for the enroute climb checklist, trim for a cruise climb speed of 120 or 130mph (your choice, depending on how fast you want to climb.) Generally, other than the initial climbout, I won't cruise-climb under a speed of 120mph. The higher airspeed provides significant cooling benefits to our hard-working engines. Also, now's a good time to turn off your landing lights, if you're leaving the pattern and/or you're IFR and being vectored by ATC.
Let's climb up to 9,000 feet MSL, our enroute cruise altitude, and clean up the aircraft. Start your level-off at 8,900 feet, holding level flight no higher than 8,950. Add in a full crank of nose-down trim. As the aircraft picks up speed it will want to climb. By the time it's up to 9,000 feet you'll have it perfectly trimmed. Keep your climb power setting (which is now also, quite likely, your cruise power) until airspeed stops increasing. Close the cowl flaps, pull the props back to 2400 or 2450 RPM (some pilots recommend 2450 due to optimal valve timing; that is what I use), and set your mixtures. At 75% power, you should see no higher than 9 gph per engine. Cruise power at 75% is typically just under 22 inches of manifold pressure combined with the aforementioned prop setting. At 9,000 feet we'll be a little closer to 65% power, my preferred cruise power setting.
The cruise checklist calls for switching from the mains to the auxiliary tanks. You never want to take off or land on your auxiliaries, so the proper procedure is to climb out on the mains, switch to the auxiliary tanks for cruise, and use all 30 gallons if need be before switching back to the mains for descent and landing. Incidentally, the POH recommends using the fuel pumps when switching tanks. When I was checked out in the Twin Comanche, my instructor (with thousands of hours in Twin Comanches) told me to skip this step at altitude. With thousands of feet above flat ground, I don't worry about it, and simply switch the tanks over one at a time without using the auxiliary pumps. The goal is to reduce wear and tear whenever possible.
|
|
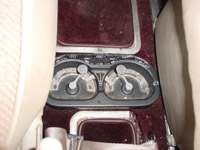 The fuel selector. Each side has four positions: off, aux, main, and x-feed. It is located between the pilot and copilot seats.
 |
Fuel mismanagement is one of the leading causes for accidents involving general aviation aircraft, and the Twin Comanche is certainly not exempt from this statistical curse. The fuel system in the Twin Comanche deserves some attention. First, it is important to note that although there are four fuel tanks (six if you have tip tanks), there are only two fuel gauges; the gauge indicates the level of the tank selected by the fuel selector. These are old float indicators, and they're not perfect. If you have a fuel totalizer on board you'll find this much easier, but it's wise to track fuel use by tank with time. It's worth keeping a fuel/time log, as well. It also bears repeating that there is absolutely no substitute for visually checking the fuel level in each tank prior to every flight.
Second, when you cross-feed from one side to the other, be aware that the selected tank is what the crossfeeding engine will draw from. When cross-feeding, the fuel indicator for that side should read zero. It's a good practice to check your cross-feed lines by taxiing out with cross-feed to the left, then doing the runup with cross-feed to the right.
Be sure you don't have a loose filler door before you depart. On the auxiliary tanks, an open tank vent, about ˝" in diameter, serves as a perfect fuel vacuum if the door opens in flight. The fuel will be sucked out at a stunning rate. (Ask me how I know.)
Anyway, back to our flight. With the airplane cleaned up, the cruise checklist completed, there's little more to do than sit back, relax, and monitor your systems. You're at 160+ knots true airspeed, and the earth is rolling smoothly beneath you. In three hours you'll be more than 450 nautical miles away.
Before we know it, it's time to prepare our descent. ATC has graciously given us pilot discretion from nine down to four thousand feet. The descent checklist calls for us to adjust cowl flaps as needed – we'll leave them closed, of course – and switch to the main tanks. After that's completed, we'll pitch for a 500 foot per minute rate of descent, making sure to keep our manifold pressure below our cruise setting.
This will give us a true airspeed of 175-180 knots. Assuming no wind, that means three miles per minute. At 500 feet per minute rate of descent, this means that it will take 10 minutes, or 30 miles, to get down to 4,000 feet. The Twin Comanche's laminar wing and highly aerodynamic design provide for very efficient operation, and sometimes, unwanted airspeed. In this case, we'll take it, since the air is smooth. At 50 miles from our destination, we begin our descent down to 4,000 feet, pulling back another inch of manifold pressure for every thousand feet we descend.
Once we get down and level off, our speed will have dropped to approximately 145-150 knots and we'll have plenty of time to get down for the approach. We're told to expect the ILS, and we'll be vectored to the final approach fix.
Within 15nm of the FAF, start reducing manifold pressure. The goal here is to reduce to 18" of MAP before you're given a localizer intercept heading. This will give you an airspeed of 140mph (120 knots) which is what you want to keep all the way down to short final on the approach. Don't forget the pre-landing checklist, and don't forget to thoroughly brief the plate and set up the stack. We have a lot of gear here to work with, so the ILS should be a snap.
"Twin Comanche 7999Y, 4 from the marker, turn left heading 120, maintain 2000 until established, cleared ILS runway 9L approach, keep your speed up for spacing please."
Heh… no problem with that last request. We turn to an intercept course and wait for the localizer to come alive. We've correctly trimmed the airplane, and it flies quite nicely at 140 mph, no problem 'tall. Needle's alive, we call it, turn to our inbound course, and start flying the localizer.
A few moments later, speed still pegged at 140mph, we see the glideslope come alive and start descending down into our altitude. One dot below glideslope, it's time to extend the gear, perform a GUMPPS, and our 5 Ts. Verify that you're below Vle, 150mph, before extending the gear. 140mph is recommended; it's less work for the motor to get the gear down.
Our GUMPPS in this case consists of:
GAS (fuel selectors on main tanks)
UNDERCARRIAGE (gear down indication, nose gear visible in the nacelle mirror)
MIXTURES (forward for sea level or set as desired for high elevation airports)
PROPS (bring them forward on short final)
PUMPS (fuel pumps on)
SWITCHES (landings lights on, pitot heat off if necessary)
 * It's worth noting that the single green gear-down light will not illuminate unless all three of the landing gear have extended. As a second point of reference, pulling the throttles back below 12" MAP with the gear up should activate a loud warning horn and a blinking yellow gear-caution light. Both are means of verifying that the gear is truly down; if you don't get a green light, but pulling the throttles back doesn't give you a warning horn and flashing caution light, suspect the gear down bulb. Finally, the Twin Comanche's landing gear is completely electric and mechanically linked. If the nose gear is down, so are the mains. Barring a virtually unthinkable catastrophe, it's impossible for one to be down without the others.
 |
With the gear down and the throttles at 15-16" MAP, you should be coming down right at 140mph and approximately 500 fpm. This is an ideal approach speed; it's easier to maintain the glideslope, the plane will respond crisply to your inputs, and it's just a smoother way to get down. You will note that at 140 mph, you are above the flap extension speed. That's right, we're flying this ILS without flaps. Welcome to one of the TwinCo's idiosyncracies; the flap extension speed is 125 mph (115 mph recommended) and you can't extend them at this approach speed. We'll leave them retracted until we either break out of the clouds or short final, whichever comes first. If 120 knots sounds too fast to flying down to ILS minimums (typically 200 feet AGL), don't worry about it. The runways for an ILS are always long, and having 120 knots of speed under your belt makes a missed approach less exciting. As soon as you break out, reduce power back to 12-13" MAP, and you'll be down to 115mph in just a few seconds. Drop full flaps (do it in one-second intervals to avoid an uncontrollable roll in the event a flap gets stuck) and you'll be at 100mph well before you cross the fence.
Perform another GUMPPS, make sure your props are forward and the gear is down, (then do it again) and give yourself a half-crank of nose up trim. We really want to be over the numbers at 95 mph or we'll float… a trait common to the entire Comanche line.
The Twin Comanche is a short-legged bird. The clearance between the ground and the trailing edge of the flaps is a scant two feet. When the flaps are full extended, that distance is even less, which really exacerbates the problem of ground effect on landing. Landing long is a very easy mistake to make in the Twin Comanche and precision approach airspeeds are the best defense against doing so.
The trim is truly your friend on landing, like it is with most other aircraft. Give yourself another liberal full crank of nose-up, but be careful not to trim away too much of the pressure, or the nose may be difficult to keep down on full-power application, such as on a go-around.
Since the Twin Comanche sits so close to the ground, most pilots tend to try to land at about 3-4 feet AGL on their first attempt. Watch your visual references and keep a little power right up until the flare, then bring the throttles back to idle. Hold the nose off until you've got nothing left, and if you're lucky you'll be rewarded with a nice squeaker. In such an example (especially if you have a forward CG) the plane is very apt to land flat, since the nose gear extends down further than the mains. This is not a problem, however, and from your perspective in the cockpit you'll have a noticably high AOA. All normal for the TwinCo. Now that I just teased you with the possibility of a squeaker, let's talk about reality. I have yet to meet a Twin Comanche pilot who could get roll-on landings with any degree of regularity. For all of its other gifts, the TwinCo is simply not wont to reward its pilot with a predictably nice landing. I've tried everything I can think of, and I still thump one in more often than I'd like. Stay as close to the ground on the flare as you can and that's about the best you can do. Be careful not to touch down on the nosegear first, as the prop clearance is minimal.
"There are a number of things you can do to improve your odds of making nicer landings. The first one is to bring passengers – no, really!"
The first thing I do when the plane settles down is raise the flaps. Again, there's some controversy here, but I'm only telling you what works for me. As soon as the flaps are up, the brakes are much more effective and you reduce your rollout distance. Obviously, if you grab for the gear handle instead of the flaps you'll have a bad day. The way I look at it, the two controls are located a foot away from each other. If I'm worried about grabbing the wrong one by mistake, maybe I shouldn't fly a complex aircraft. Again, this is subjective and the choice is yours. If you're worried about accidentally raising the gear after landing, don't mess with the flaps.
Make sure to perform your after landing checklist as soon as you clear the runway. Too often we see pilots taxiing at night with landing lights and strobe lights blinding everyone in the vicinity. Also, be sure to return trim to the neutral position just in case you miss it on your next flight. It's probably well aft of neutral by the time you land.
There are a number of things you can do to improve your odds of making nicer landings. The first one is to bring passengers - no, really! The Twin Comanche features a very forward CG. In fact, one would have to really work at it to fly with a CG that was too far aft. This is a nice design feature, because it allows the plane to be fully loaded without any CG issues; if you're light, the plane's more stable anyway. The downside is that when you're flying solo, and light weight (end of the flight, after using up most of your fuel) the nose will plop ungracefully down onto the runway no matter what you do. It's common for pilots who don't typically bring passengers or lots of luggage to put 100 lbs. of dead weight in the baggage area to move the CG a bit more aft, and provide for smoother landings.
|
* Another tip, which I personally don't care for, is to approach with half flaps; as you cut power and flare, drop them the rest of the way. Theoretically, this softens the landing as the flaps deploy and counteract the sudden loss of thrust. Sounds like a lot of cockpit wrangling to me, at a time when your eyes should be outside of the airplane 100% of the time. |
Finally, if the runway's long and you're not holding anyone up on final, make a normal approach and keep just a skosh of power in all the way through the flare. You'll float quite a ways but you'll increase your odds for rolling on. Basically, this is nothing more than a soft-field landing technique. I frequently use it when I fly because my home airport features a 9,000 ft. runway, and my most commonly visited strips are all at least 5,000 feet in length.
Taxiing in, we check our watch, and marvel at the fact that we just handily beat the airlines, door-to-door, with no security hassles. This is definitely the way to travel!
IFR
In the previous section I mentioned flying an ILS at 140mph, no flaps, gear down. I'd like to elaborate on the two basic techniques I use for approaches when flying the Twin Comanche: they differ based on whether I'm shooting a precision (ILS) approach vs. non-precision (no glideslope) approach.
A quick review. An ILS features a glideslope, thus we can fly a single airspeed and power setting down all the way from the FAF to the missed approach point. It's the easiest of all approaches to fly, and with the one exception of the flap extension on short final instead of at the FAF, the TwinCo flies them pretty normally. I've already described that procedure, but the essence of it is to take a higher approach airspeed, accept the category B minimums, and drop the flaps when you've got the field visually. ATC will also appreciate your efficiency when you fly into congested airports.
You might already guess where I'm going with this. Unlike an ILS, a non-precision approach requires you to 'dive and drive.' There is at least one step-down, sometimes as many as four or five. On the last segment of the approach, you hold your altitude and inbound course until you reach the missed approach point. That might be based on time, passing a navaid, DME, a cross-radial, etc. If you see the airport at that point, down you go. If you don't, you pitch up, power up, and try again or go elsewhere. But consider the typical MDAs for a non-precision approach; typically much higher than an ILS, all things considered. VOR/DME approaches that are designed for airports in mountainous areas can have ceiling minimums of 1,000-2,000 feet AGL! More commonly, however, it's between 500 and 1,000 feet AGL. Either way, at the missed approach point, you're normally quite close to the airport, nearly on top of it. At an 800 feet MDA, for example, sighting the airport right at the MAP means closing the throttles and diving to get down to the runway. The regulations state that a 'normal approach to land' must be made, so you can't do aerobatic maneuvers to get down. The point? If you're high and fast, there's no way you'll get down in time when you're flying the slickery Twin Comanche.
Thus, my technique for non-precision approaches is different. I'll fly the same 18"/2400RPM power setting I used for the ILS, up until we get to the first stepdown fix. At that point, I drop the gear, reduce power to 16", descend to the next altitude on the chart, and wait for speed to drop to 120mph. At this point I drop approach flaps (1/2 flaps, 13.5 degrees) and increase power if necessary to maintain 120mph. This is the airspeed I want to be flying until I reach the MAP. If I see the airport at the MAP, the remaining flaps are immediately dropped, the throttles are reduced, and we'll come down out of the murk quite quickly to land. The 20mph difference and flap setting make a big difference.
On every approach I make, whether it's an instrument approach or I'm landing visually, I perform several GUMPPS checks. There have been a lot of gear-up accidents in the Comanche line, and the most common cause is the pilot forgetting to lower the gear. You have all the tools you need to get the gear down; get in the habit of multiple GUMPPS checks and you'll be saved by habit when you forget 2 out of 3. Speaking of which, a flight instructor friend of mine taught me a 'centerline' check which is so ingrained into me now that I do it automatically without thinking. When I'm lined up on the centerline to land, I check mixtures, props, throttles, and gear. Think "center" for the center line, and "center" for your throttle quadrant and landing gear switch located in the center of the airplane. I'm pretty paranoid about forgetting to lower the gear, and I intend to keep it that way.
Enroute in the system, the TwinCo is as easy to fly as any other twin. When flying on the instruments, remember the pitch sensitivity of the aircraft. It only takes a tiny nudge to get the nose moving up or down, so be ready with an ever-so-gentle control pressure to keep the plane level. Tiny movements in the attitude indicated by the miniature airplane in the artificial horizon will quickly lead to altitude changes, so stay alert. It goes without saying that if you use an autopilot in IMC, you should be sure to monitor it carefully.
For holds, use 18"/2400 RPM, maintain 140 mph, and be sure to adjust your mixtures to conserve fuel.
THE UNDESERVED BAD REPUTATION
Over the years, the Twin Comanche has undeservedly earned a questionable reputation as a "hot" or even "dangerous" airplane. Nothing could be further from the truth. I recall discussing Twin Comanches with a DPE. His ears perked up when I mentioned that I planned to buy one. "You'd better be careful," he said. "That plane will kill you. It's dangerous." These rumors persist today, many years after the last TwinCo rolled off the assembly line. A little history is in order to understand why this is the case.
The Twin Comanche was initially catered to the training market. Multi-engine aircraft are expensive to operate, and Piper saw an opportunity to produce a cost-effective twin in which flight schools could train students. When the Twin Comanche rolled off the lined in 1964, they were gobbled up and soon became the trainer of choice at flight schools across the nation. The price tag and performance were just too good to turn down. Everyone and his brother was getting multi-rated in the Twin Comanche.
|
|
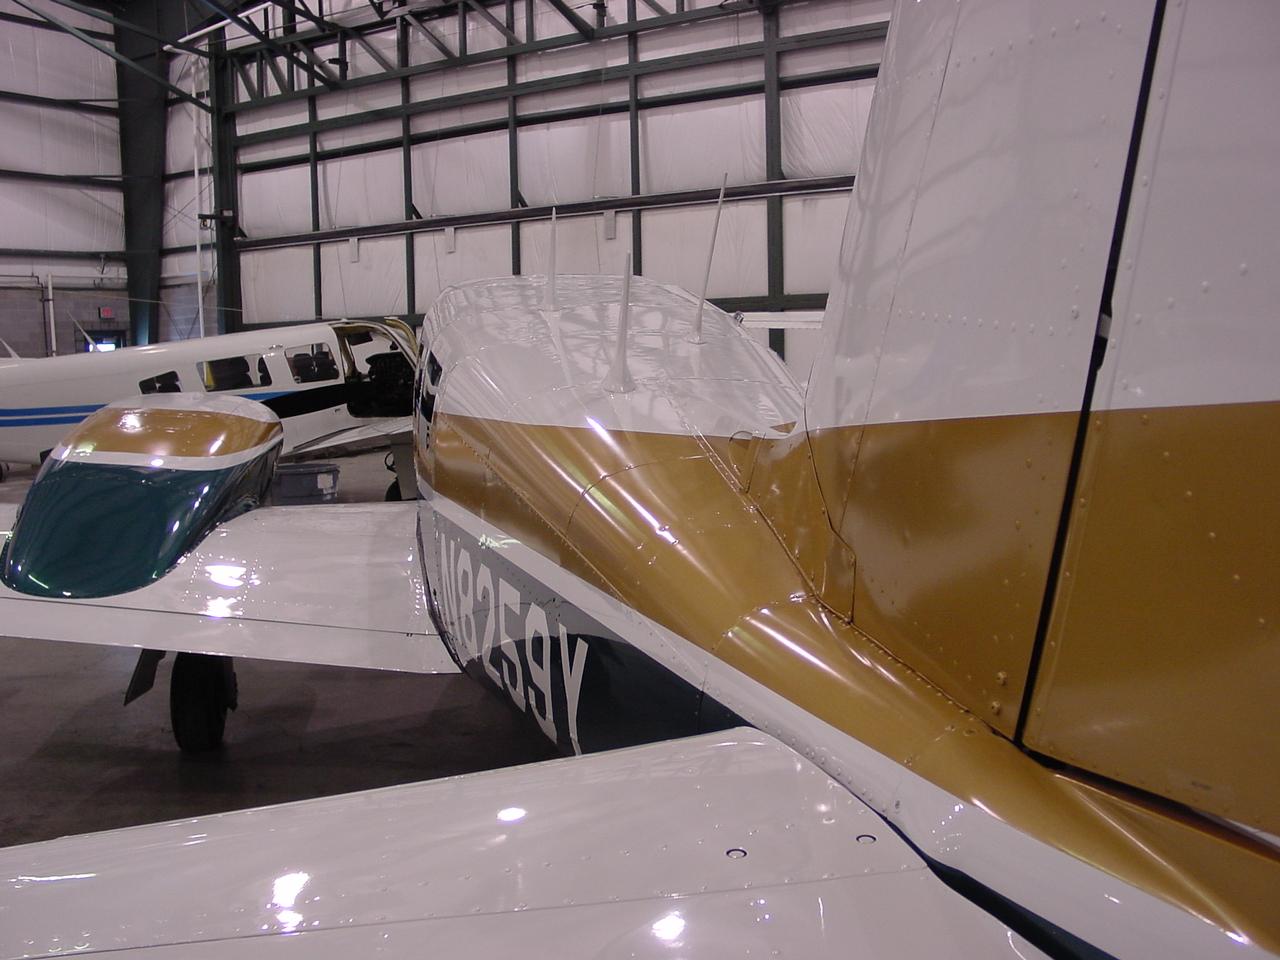
 No doubt about it, the TwinCo is an aesthetically pleasing airplane.
 |
In those days – up through the 1970s – the FAA wanted Vmc demos done at low altitudes. The reason for this was to maximize the effect of the asymmetric thrust (because normally-aspirated piston engines perform better at low altitudes.) Low-altitude single-engine training is dangerous; some students stalled, some spun. Close to the ground, there's very little margin for error. The number of training accidents started adding up. Piper responded by raising the placarded minimum single-engine control speed from 80mph to 90mph, and installed stall strips on the leading edges of the wings. But it was too late; the reputation had been earned and it lingers to this day.
Let me state from personal experience that there is absolutely nothing unusual about the Twin Comanche's single engine flying habits. I've even flown a Miller mod Twin Comanche with 200 horsepower per side and it was quite easy to control. Don't believe everything you read. The Twin Comanche is a high performance airplane and it demands respect, but you certainly have no reason to fear losing an engine in one. Normal multi-engine emergency procedures apply.
BUYING A TWIN COMANCHE
The airplane generally does well in the market, and TwinCos steadily appreciate in value. You should expect to pay between $90,000-$100,000 for an average, mid-time, normally equipped Twin Comanche. The younger the bird, the higher the price, although $150,000 is probably the peak for what the plane is worth as of this writing (2002). The average fleet age is between 4-5,000 hours on the airframe.
 You absolutely, positively want an experienced Comanche mechanic to inspect the airplane for you prior to purchase. Unfortunately, I did not follow this advice and paid a heavy price. My Twin Comanche was purchased with purportedly "new" engines (300 hrs. SMOH), but both engines ended up having to be replaced. In addition, new fuel pumps, new fuel bladders, control lines, windows, generators, and much more had to be replaced over the course of a year. I could have avoided this headache if I'd been more careful about the plane's inspection. Don't skimp. Pay for the best, most experienced mechanic you can find to check out the plane. The investment will pay you back in spades.
Insurance is getting more expensive for these older aircraft. Even high-time ATPs are paying several thousand per year on hulls of $100,000 and four seats. You'll want to insure the aircraft as a four-seater to reduce your premium.
Join the International Comanche Society prior to buying your Twin Comanche. Membership is inexpensive and very valuable. The ICS features the services of Maurice Taylor, the Comanche guru, and you're permitted to call with any questions you have about the breed. I've received outstanding benefit from my membership as a result of interaction with other members, who've frequently helped me out with quirks and squawks on the plane that mystified the mechanics.
Also check out ComanchePilot.com, a site for Comanche owners.
I hope prospective owners have found this document useful. Please feel free to contact me with any questions at ryan@fergworld.com. 
|


